SpringBoot定时任务+自定义线程池

背景

在真实的Java开发环境中,我们经常会需要用到定时任务来帮助我们完成一些特殊的任务,比如我最近写的晚上11点定时拉取第三方的数据入库,晚上12点清理脏数据等等。

如果我们使用SpringBoot来开发,那么定时任务将会变得非常简单。SpringBoot默认已经帮我们封装好了相关定时任务的组件和配置,我们只需要在相应的地方加上@Schedule注解就可以实现定时任务。

启动定时任务

SpringBoot项目只需要在启动类上加上@EnableScheduling即可开启定时任务

1
2
3
4
5
6
7
8
9
@SpringBootApplication
@EnableScheduling
public class ScheduleTestApplication {

public static void main(String[] args) {
SpringApplication.run(ScheduleTestApplication.class, args);
}

}

创建定时任务

SpringBoot的Scheduler支持四种定时任务格式

  • fixedRate:固定速率执行,例如每3秒执行一次
  • fixedDelay:固定延迟执行,例如距离上一次调用成功后3秒执行
  • initialDelay:初始延迟任务,例如任务开启过3秒后再执行,之后以固定频率或者间隔执行
  • cron:使用 Cron 表达式执行定时任务

以上在企业开发中经常用到的是cron表达式,可以说掌握了cron表达式,基本就掌握了SpringBoot的定时任务了。

使用cron表达式

1
2
3
4
5
6
7
8
9
10
11
12
@Component
public class ScheduleTask {

SimpleDateFormat sdf = new SimpleDateFormat("yyyy-MM-dd HH:mm:ss");

//每隔5秒执行一次该方法
@Scheduled(cron = "*/5 * * * * ?")
public void testScheduleTask() {
System.out.println("SpringBoot的定时任务" + Thread.currentThread().getName() + sdf.format(new Date()));
}

}

img

@Schedule默认线程池大小

其实@Schedule默认线程池大小为1,我们可以实验得出这个结论。

1
2
3
4
5
6
7
8
9
10
11
12
13
14
15
16
17
@Component
public class ScheduleTask {

SimpleDateFormat sdf = new SimpleDateFormat("yyyy-MM-dd HH:mm:ss");

//固定2秒执行一次该方法
@Scheduled(fixedRate = 2000)
public void testScheduleTask() {
try{
Thread.sleep(6000);
System.out.println("SpringBoot的定时任务" + Thread.currentThread().getName() + sdf.format(new Date()));
} catch (InterruptedException e) {
e.printStackTrace();
}
}

}

img

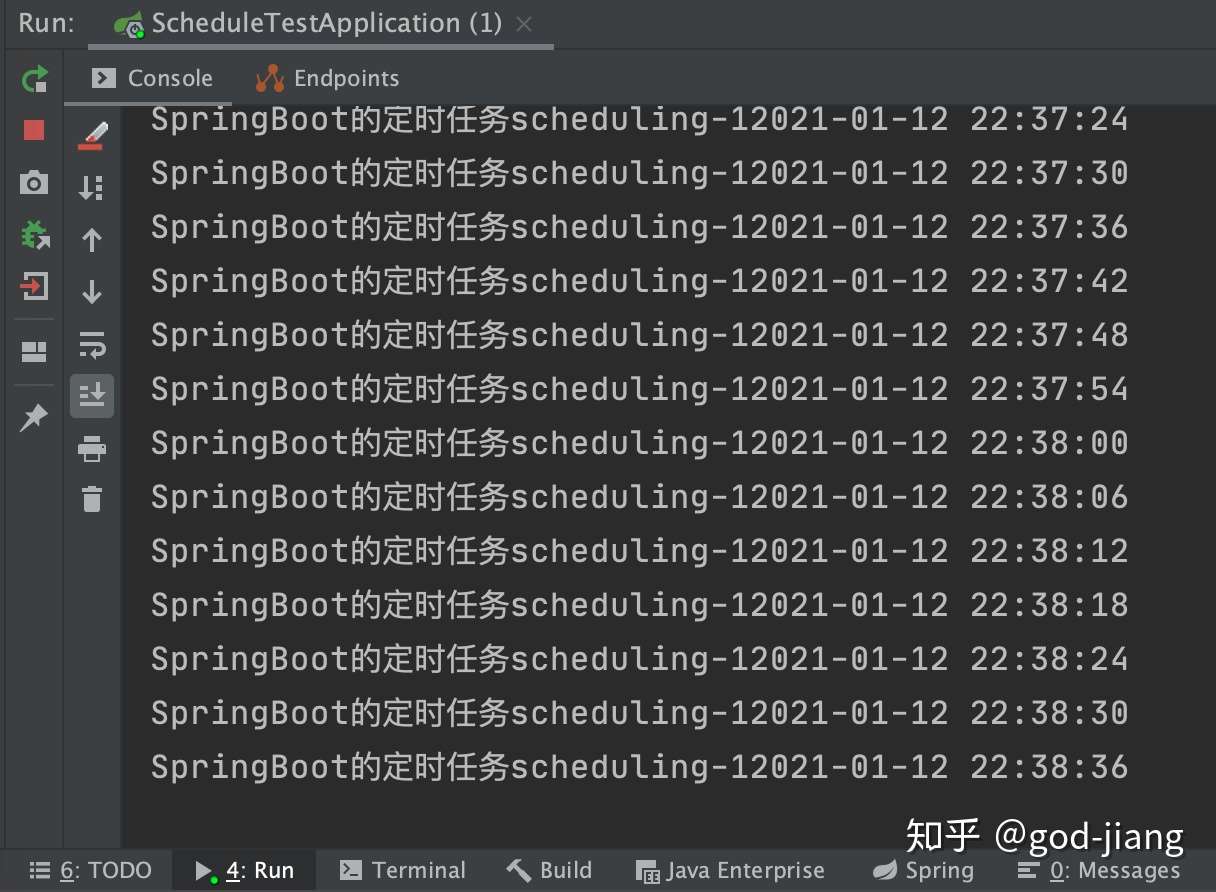
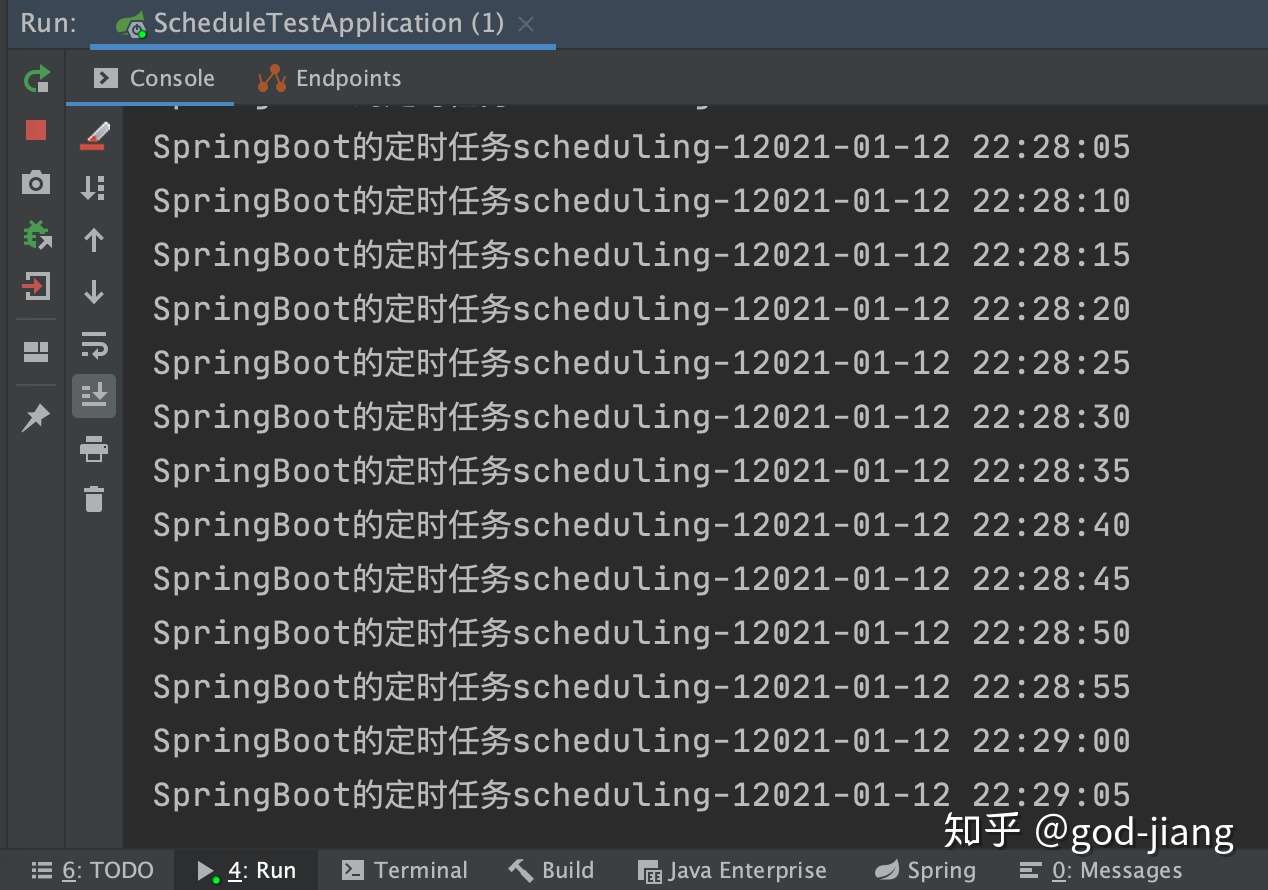
结果每隔6秒执行一次,可以看到线程的名字为scheduleing-12021-01-12,表示都是用的同一个线程,默认@Schedule是开启一个线程。

一般情况下使用默认@Schedule没有问题,但是如果有多个定时任务,每个定时任务执行时间可能不短的情况下,会有可能出现定时任务一直没有机会执行的情况。

异步执行定时任务

给该方法加上@Async进行异步处理,看看会是什么效果~

1
2
3
4
5
6
7
8
9
10
11
12
13
14
15
16
17
18
@Component
@EnableAsync
public class ScheduleTask {

SimpleDateFormat sdf = new SimpleDateFormat("yyyy-MM-dd HH:mm:ss");

@Async
@Scheduled(fixedRate = 2000)
public void testScheduleTask() {
try{
Thread.sleep(6000);
System.out.println("SpringBoot的定时任务" + Thread.currentThread().getName() + sdf.format(new Date()));
} catch (InterruptedException e) {
e.printStackTrace();
}
}

}

img

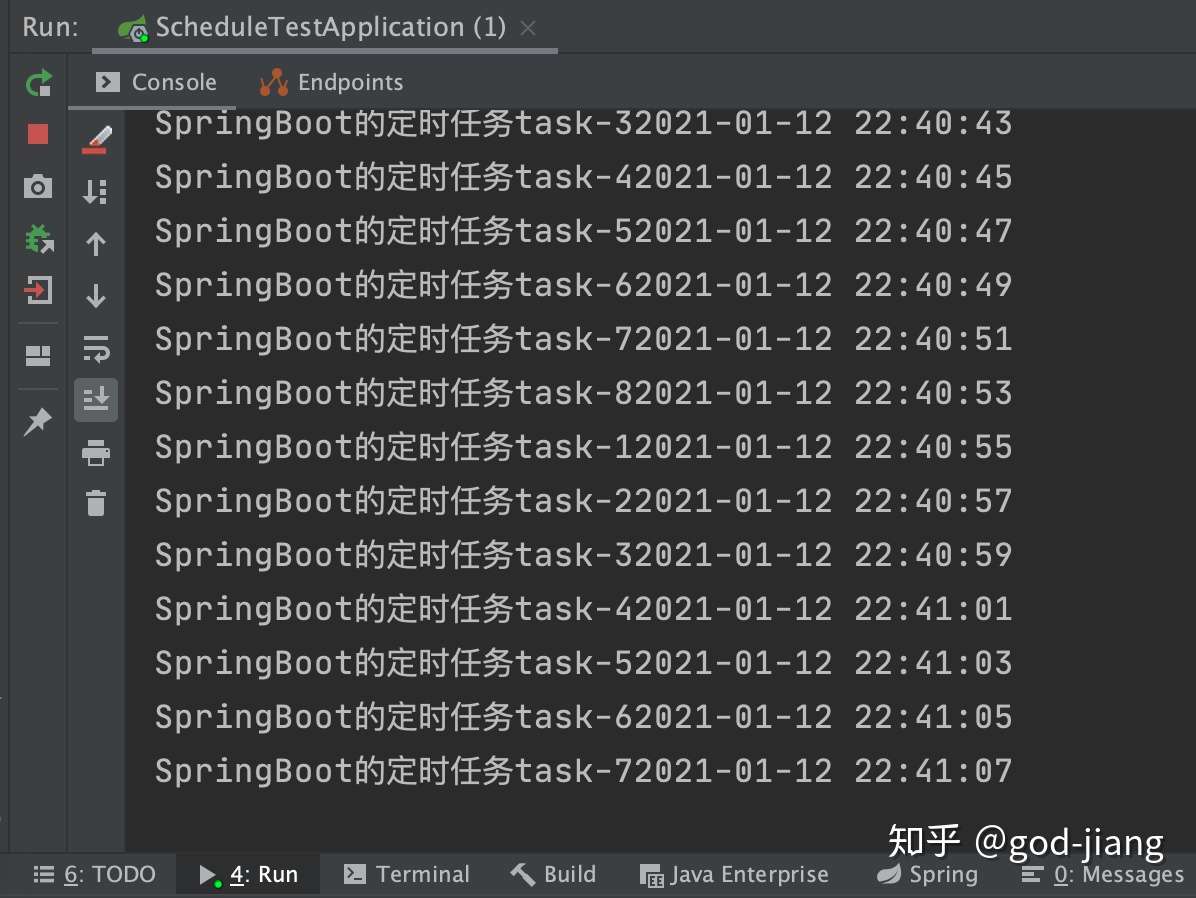
可以看出线程的名字都是不一样的,然后每隔2秒的执行一次该方法,异步处理不受方法内的时间影响,并行执行。

手动实现自定义任务线程池

虽然可以用SpringBoot提供给我们的异步注解@Async处理,但是我们开发者也可以手动实现一个线程池,更好的配置和使用我们的异步处理。

1
2
3
4
5
6
7
8
9
10
11
12
13
14
15
16
17
18
19
20
21
22
23
24
25
26
27
28
29
30
@Component
public class AsyncScheduledTaskConfig {

@Bean
public Executor myAsync() {
ThreadPoolTaskExecutor executor = new ThreadPoolTaskExecutor();
//最大线程数
executor.setMaxPoolSize(100);
//核心线程数
executor.setCorePoolSize(10);
//任务队列的大小
executor.setQueueCapacity(10);
//线程前缀名
executor.setThreadNamePrefix("god-jiang-");
//线程存活时间
executor.setKeepAliveSeconds(30);

/**
* 拒绝处理策略
* CallerRunsPolicy():交由调用方线程运行,比如 main 线程。
* AbortPolicy():直接抛出异常。
* DiscardPolicy():直接丢弃。
* DiscardOldestPolicy():丢弃队列中最老的任务。
*/
executor.setRejectedExecutionHandler(new ThreadPoolExecutor.AbortPolicy());
//线程初始化
executor.initialize();
return executor;
}
}

使用自定义的线程池实现异步处理

1
2
3
4
5
6
7
8
9
10
11
12
13
14
15
16
17
18
@Component
@EnableAsync
public class ScheduleTask {

SimpleDateFormat sdf = new SimpleDateFormat("yyyy-MM-dd HH:mm:ss");

@Async("myAsync")
@Scheduled(fixedRate = 2000)
public void testScheduleTask() {
try{
Thread.sleep(6000);
System.out.println("SpringBoot的定时任务" + Thread.currentThread().getName() + sdf.format(new Date()));
} catch (InterruptedException e) {
e.printStackTrace();
}
}

}

img

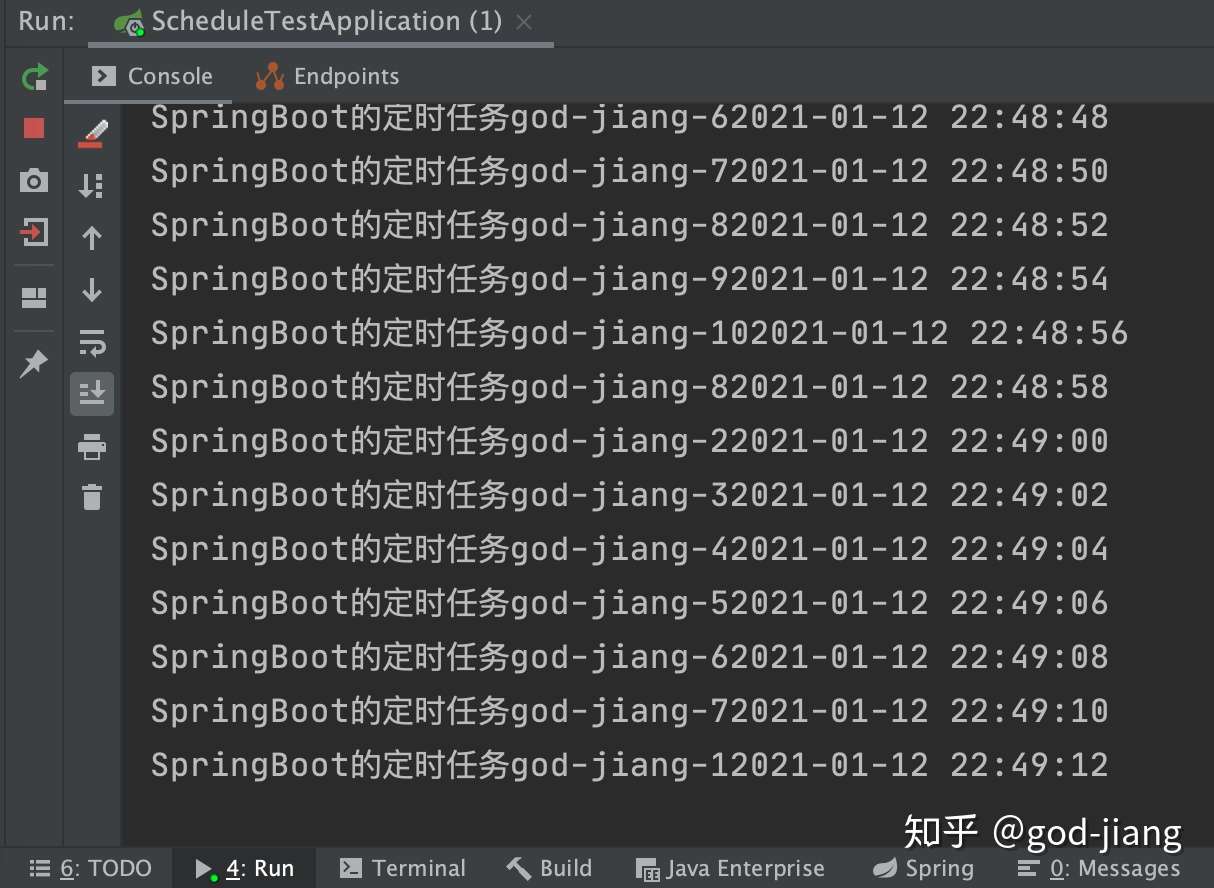
当前线程名称已经被改成自定义god-jiang-的前缀!

总结

以上就是我在企业开发中所用到的SpringBoot的@Schedule定时任务,并且搭配上我手动实现的线程池异步执行,基本可以满足绝大部分的开发需求,希望以上的内容对你们有所帮助~~~

-------------本文结束感谢您的阅读-------------

本文标题:SpringBoot定时任务+自定义线程池

文章作者:god-jiang

发布时间:2021年01月20日 - 22:00:28

最后更新:2021年01月20日 - 22:02:47

原始链接:https://god-jiang.github.io/2021/01/20/SpringBoot定时任务-自定义线程池/

许可协议: 署名-非商业性使用-禁止演绎 4.0 国际 转载请保留原文链接及作者。

创作不易,您的支持就是我坚持的动力,谢谢大家!
0%